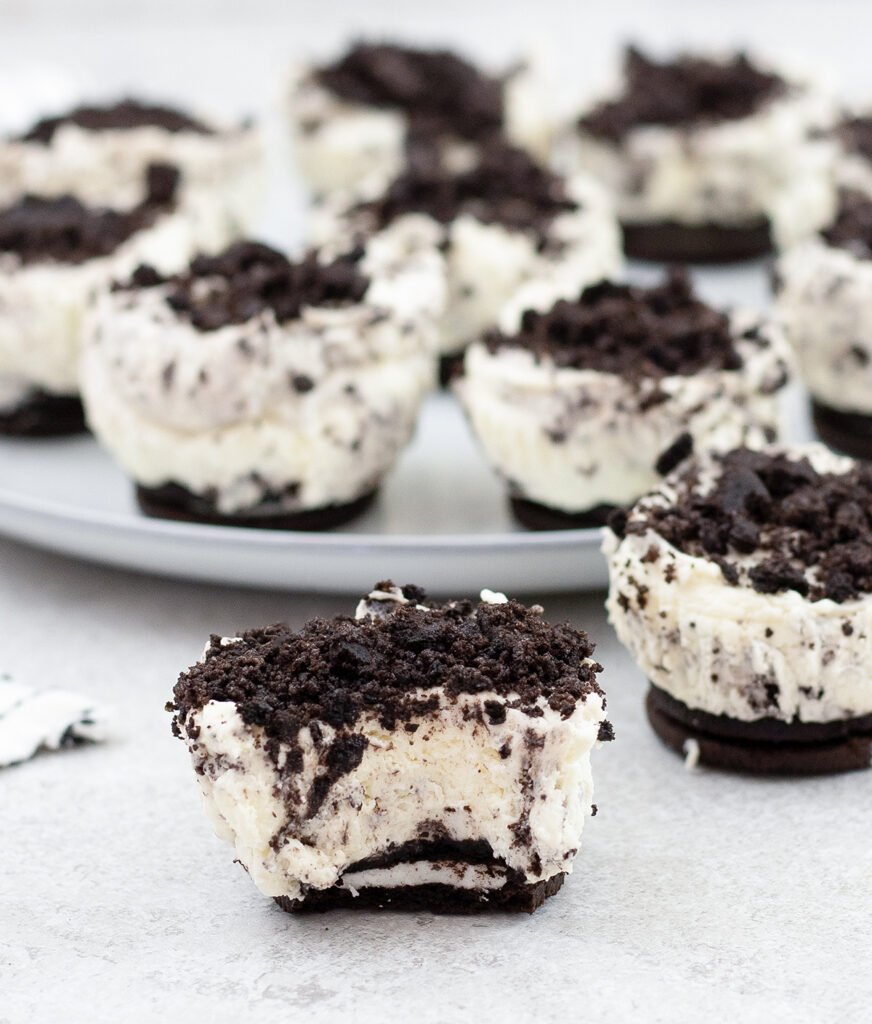
If you love cheesecake and Oreo cookies but do not want to spend hours in the kitchen, these Healthy No-Bake Oreo Cheesecake Bites are the perfect little treat. They are creamy, chocolatey, easy to prepare, and best of all, you do not need to turn on the oven.
I love recipes like this because they give you that delicious cheesecake experience in a small, convenient portion. Each bite starts with a crisp Oreo Thin, followed by a smooth cheesecake-style filling made with lighter ingredients, and finishes with a sprinkle of crushed cookies.
These little desserts are especially fun for Easter, spring parties, family gatherings, birthdays, potlucks, and afternoon snacks. You can prepare them ahead of time, keep them in the freezer, and take out exactly as many as you need.
If you have been looking for an easy no-bake dessert that feels special without requiring complicated baking skills, I think you are going to love this recipe.
Why You’ll Love These No-Bake Oreo Cheesecake Bites
There are plenty of reasons to make these Oreo cheesecake bites. The first is simplicity. You only need a handful of ingredients and a few basic kitchen tools.
There is also no oven involved. Instead of baking a cheesecake and waiting for it to cool, you simply mix the filling, spoon it into cupcake liners, and freeze until firm.
I also love the individual portions. Instead of cutting a large cheesecake into slices, everyone can grab one little cheesecake bite. This makes serving much easier when you are entertaining.
The texture is another reason these treats are so enjoyable. The Oreo base gives you a little crunch, while the cream cheese, Greek yogurt, and whipped topping create a soft and creamy center.
And because you can keep them frozen, they are an excellent make-ahead dessert when you want something sweet waiting in the kitchen.
A Simple Lighter Dessert Idea
This recipe uses lighter ingredients than a traditional rich cheesecake. Fat-free cream cheese, non-fat vanilla Greek yogurt, low-fat whipped topping, and Oreo Thins create a dessert that feels lighter while still giving you the familiar Oreo cheesecake flavor.
The original recipe makes 12 individual bites and uses 24 Oreo Thins—one cookie for each base and the remaining cookies crushed into the filling and used as a topping. The bites are frozen for about three hours before serving.
Of course, “healthy” can mean different things to different people. These are still a sweet treat, so I like to think of them as a lighter dessert option rather than a health food. That makes them a fun choice when you want something portion-controlled and easy.
Ingredients You’ll Need
- Fat-free cream cheese: This forms the creamy cheesecake base while keeping the filling lighter.
- Non-fat vanilla Greek yogurt: Greek yogurt adds creaminess and a pleasant tang while bringing extra protein to the dessert.
- Vanilla extract: A little vanilla brings all the flavors together.
- Salt: Just a small amount helps balance the sweetness and makes the chocolate flavor stand out.
- Low-fat whipped topping: This gives the filling its light and fluffy texture.
- Oreo Thins: These provide the signature chocolate-cookie flavor while working beautifully as the base and crunchy topping.
Healthy No-Bake Oreo Cheesecake Bites Recipe
Ingredients
- 8 ounces fat-free cream cheese, softened
- 1/2 cup non-fat vanilla Greek yogurt
- 1 teaspoon vanilla extract
- 1/4 teaspoon salt
- 8 ounces low-fat whipped topping, thawed
- 24 Oreo Thins
For Serving
- Extra crushed Oreo Thins, optional
- Mini Oreo cookies, optional
- Light dusting of powdered sugar, optional
How to Make Healthy No-Bake Oreo Cheesecake Bites
Step 1: Prepare the Muffin Tin
Start by placing 12 paper cupcake liners into a standard muffin tin.
This makes the cheesecake bites easy to remove and gives each one a neat individual shape. If you prefer, you can also use small silicone muffin cups, which make removal especially easy.
Step 2: Add the Oreo Bases
Place one whole Oreo Thin into the bottom of each cupcake liner.
Try to center each cookie as much as possible. This will become the crunchy cookie base for your cheesecake bite.
Set the muffin tin aside while you prepare the creamy filling.
Step 3: Beat the Cream Cheese
Place the softened fat-free cream cheese in a medium mixing bowl.
Using a hand mixer, beat the cream cheese until it is smooth and creamy. This step is important because softened cream cheese blends much more easily than cream cheese straight from the refrigerator.
If you see small lumps, continue mixing for another minute or two until the mixture becomes as smooth as possible.
Step 4: Add the Yogurt and Vanilla
Add the vanilla Greek yogurt, vanilla extract, and salt to the cream cheese.
Beat again until everything is well combined.
The Greek yogurt adds a gentle tang that works beautifully with the sweet Oreo cookies. The vanilla also helps create a classic cheesecake flavor.
Step 5: Add the Crushed Oreos
Take the remaining 12 Oreo Thins and crush them into small pieces.
You do not need to turn them into a completely fine powder. I actually prefer leaving some small cookie pieces because they give the cheesecake filling a little texture.
Mix the crushed cookies into the cream cheese mixture until they are evenly distributed.
Step 6: Fold in the Whipped Topping
Add the thawed low-fat whipped topping to the bowl.
Gently fold it into the cream cheese mixture. Try not to mix too aggressively because you want to keep some of the light, airy texture from the whipped topping.
Once everything is combined, you should have a thick, creamy Oreo cheesecake filling.
Step 7: Fill the Cupcake Liners
Use a spoon or small cookie scoop to divide the cheesecake mixture evenly among the 12 prepared cupcake liners.
Try to fill each liner to a similar level so all of the bites are approximately the same size.
Gently smooth the tops if you want a cleaner finish.
Step 8: Add the Oreo Topping
For extra Oreo flavor, sprinkle a few crushed cookies over the top of each cheesecake bite.
You can also place a small Oreo cookie or mini Oreo on top if you are preparing these for a party or Easter dessert table.
Step 9: Freeze
Place the muffin tin in the freezer and allow the cheesecake bites to freeze for about three hours.
This gives the filling enough time to firm up so the bites can be easily handled and enjoyed.
When you are ready to serve them, remove the desired number from the freezer and let them sit for a few minutes if you prefer a softer, creamier texture.
Tips for Perfect Oreo Cheesecake Bites
Soften the Cream Cheese
Do not skip this small step. Softened cream cheese is much easier to beat until smooth. Cold cream cheese can leave little lumps throughout the filling.
Thaw the Whipped Topping
The whipped topping should be thawed before you add it to the mixture. A cold, frozen topping will not fold into the cream cheese properly.
Don’t Overmix
Once you add the whipped topping, use a gentle folding motion. This helps preserve the fluffy texture.
Crush the Cookies to Your Preference
If you like a smoother cheesecake filling, crush the Oreos finely. If you enjoy texture, leave some larger cookie pieces.
Give Them Enough Freezer Time
The original recipe recommends freezing the bites for three hours before serving. This gives them time to become firm enough to handle.
Easy Variations to Try
Chocolate Chip Oreo Bites
Fold a small handful of mini chocolate chips into the cheesecake filling before adding the whipped topping. This gives every bite an extra chocolate surprise.
Mint Oreo Cheesecake Bites
Use mint-flavored Oreo Thins for a refreshing twist. A tiny amount of peppermint extract can also be added if you want an even stronger mint flavor.
Strawberry Oreo Cheesecake Bites
Add finely chopped fresh strawberries to the filling and decorate the tops with a small strawberry slice. This is especially pretty for spring and Easter gatherings.
Peanut Butter Oreo Bites
Add a small swirl of creamy peanut butter to the filling. Chocolate and peanut butter are always a winning combination.
Festive Easter Oreo Bites
For Easter, decorate the tops with pastel-colored sprinkles, mini chocolate eggs, or small candy decorations. The individual portions make them perfect for an Easter dessert table.
Why Greek Yogurt Works So Well
Greek yogurt is a useful ingredient in this recipe because it brings both creaminess and a little tang. Cheesecake traditionally has a slight tang from cream cheese, so the yogurt fits naturally into the flavor.
Because the yogurt is mixed with cream cheese rather than used by itself, the finished filling still has that familiar cheesecake character.
I recommend using a thick Greek yogurt rather than a very thin yogurt. A thicker yogurt helps the filling maintain its structure after freezing and thawing.
How to Store the Cheesecake Bites
These cheesecake bites are especially convenient because they can be stored in the freezer.
Once the bites are completely firm, transfer them from the muffin tin to an airtight freezer-safe container. Place parchment paper between layers if you are stacking them.
The original recipe notes that they can be kept in the freezer for up to two weeks. When you want one, simply remove it from the freezer and let it sit for about five minutes before eating.
You can also keep them refrigerated after the initial freezing period if you prefer a softer cheesecake texture.
Make-Ahead Dessert for Easter
If you are planning an Easter celebration, these bites are a wonderful make-ahead option.
You can prepare them several days before your gathering and keep them frozen. This means one less recipe to worry about on the day of your event.
When guests arrive, simply arrange the cheesecake bites on a serving platter and add a few colorful decorations.
I like the idea of placing them alongside fresh berries, pastel candies, and other small desserts. Because each cheesecake is already portioned, guests can easily take one without needing plates and knives for slicing a large cake.
Frequently Asked Questions
Do these Oreo cheesecake bites need to be baked?
No. This is a completely no-bake recipe. The cheesecake filling is mixed together and then frozen until firm.
Can I use regular Oreos instead of Oreo Thins?
Yes. Regular Oreos can be used if that is what you have available. Keep in mind that the nutritional profile will be different because regular Oreos contain more calories and fat than Oreo Thins.
Can I use another flavor of Oreo?
Absolutely. Different Oreo varieties can create fun flavor combinations. Chocolate, mint, vanilla, or seasonal varieties can all give these cheesecake bites a different personality.
How long should I freeze them?
Freeze the bites for approximately three hours before serving. This gives the filling enough time to become firm.
Can I make them ahead of time?
Yes. These are excellent make-ahead treats. Prepare them in advance, freeze them, and take out what you need when you are ready to serve.
Can I use full-fat cream cheese?
Yes, if you are not specifically trying to keep the recipe lighter. Full-fat cream cheese will create a richer and slightly denser filling.
How do I make the bites easier to remove?
Paper cupcake liners work well, but silicone muffin cups can make removal even easier. If the bites are very firm from the freezer, let them sit for a few minutes before removing the liners.
Serving Ideas
These little cheesecakes are delicious straight from the freezer after a short resting period, but you can also make them look extra special.
- Top with crushed Oreo cookies.
- Add a mini Oreo to each bite.
- Decorate with pastel Easter sprinkles.
- Add fresh strawberries or raspberries.
- Drizzle lightly with melted chocolate.
- Serve alongside fresh fruit.
- Add small chocolate eggs for Easter.
If you are serving them at a party, arrange them on a large white or pastel platter. The dark Oreo crumbs against the creamy filling make the bites naturally attractive.
A Dessert the Whole Family Can Enjoy
One of my favorite things about this recipe is how approachable it is. You do not need advanced baking skills, special equipment, or a long list of ingredients.
Children can also help with simple parts of the recipe, such as crushing the cookies, placing the Oreo bases into the liners, or sprinkling the cookie crumbs over the finished bites.
Because there is no oven involved, it is also a fun recipe to prepare together without worrying about hot baking trays.
Final Thoughts
These Healthy No-Bake Oreo Cheesecake Bites are proof that a simple dessert can still feel special. With a crunchy Oreo Thin base, creamy cheesecake filling, and plenty of chocolate-cookie flavor, every little bite gives you the combination you love from Oreo cheesecake.
I especially recommend making them when you need a dessert that can be prepared ahead of time. Freeze them, keep them stored in an airtight container, and take out only what you need.
For Easter, add pastel decorations and colorful toppings. For a family movie night, keep them simple with extra Oreo crumbs. And for a party, arrange them on a platter with fresh berries and chocolate decorations.
However you serve them, this is an easy recipe to keep in your dessert collection. You get creamy cheesecake flavor, crunchy chocolate cookies, individual portions, and absolutely no baking required.
Bonus: Your Kitchen Notes
Recipe: Healthy No-Bake Oreo Cheesecake Bites
Category: Desserts & Sweets
Style: No-Bake Dessert
Prep Time: About 5 minutes
Freeze Time: About 3 hours
Total Time: About 3 hours 5 minutes
Servings: 12 cheesecake bites
Kitchen note: Keep these bites frozen until you are ready to serve them. For the creamiest texture, allow each bite to rest for a few minutes before enjoying.


